Tuesday, January 31, 2012

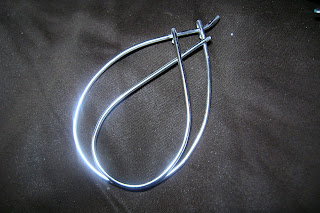
Wire Pendant

Lately I've been playing around and experimenting with wire. I find it fun and rewarding to twist some wire into wearable art. I saw this photo on Pinterest and wanted to recreate it the best I could. 
Inspiration


Supplies
  • 16 gauge wire
  • 28 gauge wire
  • Bead
  • Wire cutters
  • Round needle nose pliers

First, take your 16 gauge wire and shape it into a tear drop shape. I shaped mine before I cut it so I could make it a size I liked. I left some extra to loop it around itself and to also make a loop for a necklace chain.


Next, make a smaller tear drop shape to fit inside the first one. Leave some extra to loop the two ends around.


Then, cut a piece of the 28 gauge wire to wrap around the bottom of both tear drops. I wrapped mine off centered. 


Next, I cut another piece of 16 gauge wire and made the center. I twisted the ends using my rounded needle nose pliers. Then, I added my bead with 28 gauge wire. The wire with the bead is wrapped a couple of times around the center wire and then is used to hold the center wired to the inside tear drop.


Use more 28 gauge wire to attach the bottom of the center wire to the inside and outside tear drops.


Then,  cut another piece of 28 gauge wire and attach the other end of the center wire to the inside tear drop.


Here's a close up of the center of the pendant. 


Now you have a handcrafted wire pendant!


It doesn't look exactly like the inspiration photo but I'm happy with it. I'll keep practicing and hopefully get better at my wire shaping skills!

Monday, January 30, 2012

Rosette Flowers

Here is another variation of the fabric flowers I made previously. These flowers are awesome accessories for outfits. I love adding them to my scarves, headbands, hair and purses.

Inspiration

Supplies
  • Strip of fabric (varies on how large you want your flower. Mine was 2 in wide by 1.5 feet long)
  • Hot Glue


First, take your strip of fabric and fold it twice at one end. Then, fold the end over and hot glue it. You can also just tie a knot in it. 


Next, start twisting your fabric and wrapping it around the glued or knotted end. Adding hot glue as you go to hold the fabric in place.


Fold the last inch over to the back and hot glue it down and you're done!


You can add a pin or clip to the back or you can add them to necklaces or bracelets! They're so versatile!

Sunday, January 29, 2012

Fringe Scarf

This project was pretty simple to do. As I've said before, I love scarves! So, when I saw this way of making a diy scarf, I had to give it a try. 

Inspiration


Supplies
  • T-Shirt
  • Scissors

First, lay your t-shirt on a flat surface. This just makes it easier to cut straight.


Next, cut the seam off the bottom of the shirt.


Now, cut up the shirt into strips.


Then, cut the shirt somewhere under the sleeves. This is just how thick you want it to be.


Finally, pull on the strips a little and you have your fringe scarf!


This is super easy! It can add a little edge to an outfit.

Saturday, January 28, 2012

Fabric Covered Beaded Necklace

I saw this necklace on Pinterest and loved it's beautiful simplicity.

Inspiration


Supplies
  • Long strip of fabric
  • Beads of 3 different sizes
  • Needle
  • Thread
  • Matching fabric for ruffles
  • Scissors

Cut your strip of fabric so when sewed into a tube it will be slightly bigger than your largest bead. Mine was about 1.5 yards long. Then, sew a seam down the strip to create a tube.


Now, add a bead and push it to the middle and tie a knot on each side. Keep adding beads switching sizes and tying knots. 


Cut your extra fabric into circles. Mine were 1.5 inches in diameter.


Fold your circles and sew them to the necklace in a bunch to create a ruffle look.


Now you have a beautiful necklace on the cheap! 

Friday, January 27, 2012

Painted Shoes

This project was a blast! It's really easy to do and you get a new pair of shoes out of shoes you already have!


Inspiration


Supplies

  • Pair of Shoes
  • Primer Paint
  • Acrylic Paint
  • File or Sand Paper
  • Paint Brush
  • Clear gloss sealer


First, lightly file or sand your shoes. This helps rough them up so the paint sticks better.


Next, paint the shoes with the primer and let dry.


Now, paint your shoes in the acrylic paint of your choice. I choose the color Laguna. I had to do a couple of coats.


After the last coats of paint dries, draw your design on the shoe with a pencil.


Then, paint your design with a different color of acrylic paint.


After that color dries, spray with the clear gloss sealer.


Now you have a new pair of shoes without having to leave your closet! 

Thursday, January 26, 2012

Burlap Wreath

So, this posting today is actually a project I did before Christmas. I was working on a project last night and it took longer than I expected and needed to dry overnight. It will be done for posting tomorrow though! Since it ended up being a two evening project, I decided to post my burlap wreath I made. I absolutely love this wreath!


Inspiration


Supplies

  • Foam Wreath (I used a 14 inch)
  • Burlap (I used 2 yards)
  • Hot Glue
  • Scissors
  • Embellishments (optional)


First, cut your burlap. I cut a long strip and wrapped it around my wreath. You could also spray paint it a close color to your burlap. This helps if there are any small gaps. Then, cut the rest of the burlap into 5 inch squares.


Now, fold a piece of the burlap in half twice and cut a curved edge around the top of the folded burlap. Also, cut the bottom point off. This give the burlap a flat bottom to help it stick to the wreath. Continue this step for all the pieces.


Then, add a lot of hot glue to the cut bottom and start attaching pieces to the wreath. Continue this step until your wreath is covered.


You can now either be finished, or you can add some embellishments. I made simple t-shirt flowers (tutorial here) and added some berries. 


I love how this wreath turned out! Red is one of my favorite colors to decorate with. I just think it adds such a nice pop of color to our door!

Wednesday, January 25, 2012

Raised Beaded Wrap Bracelet

Like I've said before....I LOVE wrap bracelets. This one is a slight variation from the beaded wrap bracelet I made previously.

Inspiration


Supplies

  • Leather or Hemp Cord
  • Beads
  • Thread
  • Fastener
  • Scissors
  • Needle


First, cut your cord to size. I doubled it up and wrapped it around my wrist three times. The length will vary due to wrist size and how many times you want it to wrap. Then, knot a loop at one end.


Next, cut a long length of thread and start stringing your beads. I measured the string to my cord and cut it to size. I also used a needle to help with stringing the beads. 


After you're done stringing the beads, tie another long piece of thread to the looped end of the cord. Then, lay the string of beads on top of the cord on the seam where the two lengths of cord meet. Now start wrapping the thread in between each bead.


Once you're finished with the longest and most tedious part of the bracelet, tie another knot at the end. Be sure to leave room to add your fastener. I, again, used a wire spiral I made from 18 gauge wire. 


That's it! It takes a bit of time and patience, but you get a beautiful wrap bracelet in return...and on the cheap!


Ok, so now I'll try to stop making bracelets for a few days and change it up some!