Friday, March 30, 2012

Color Block Nails

Some may have noticed that I haven't been posting once a day lately. I've found that sometimes life doesn't always run on a schedule. So, it may not always be a Pinterest a Day but more like a Pinterest Most Days. :) I've also decided to expand what I post about. I'm going to start adding hair, nails, clothing (finding bargains to match high priced fashion), etc. Today, I've decided to start that with a nail tutorial!

Inspiration


Supplies
  • 2 different colors of nail polish
  • Tape

First, paint your nails one color (best to paint it the lighter color). I did two coats. Wait for nails to dry completely. Then, tape off where you want the color to be. 


Paint the open area with the other color. I did two coats. Wait for it to dry a bit


Remove tape. Now you have color block nails!


Tuesday, March 27, 2012

Homemade Stain Remover

If you have a household like mine, stains happen. Somehow, stains just appear on the carpet. I've tried many different store bought stain removers and have found that most of the time, they don't really help. I saw this post on Pinterest and thought I would give it a try. It was amazing! It got up a couple of small stains that were there when we first moved into the house two years ago! I couldn't believe how well it worked and how easy (and cheap) it was to make.


Inspiration
Supplies

  • Baking Soda
  • 1 tbsp dish washing liquid
  • 1 tbsp white vinegar
  • 2 cups warm water
  • White cloth
  • Vacuum cleaner
  • Cold water


If it's a new stain, wipe up the liquid.
Sprinkle baking soda or cornstarch on stain to let absorb for 10 minutes and then vacuum.
Mix one tablespoon dish washing liquid and one tablespoon white vinegar with two cups of warm water.
Using a white cloth (colored cloths can leave their color on the carpet), sponge the stain with the detergent/vinegar solution and blot until all the liquid is absorbed.
Sponge off with cold water and blot dry.


Voila! The spots are gone! 


I tried this and forgot to take pictures. However, I have a couple more place to try it on and I will post photos then!

Monday, March 26, 2012

Pizza Bites

My whole family LOVES pizza. When I saw this recipe for bite sized pizza, I knew I had to make it.

Inspiration


Ingredients
  • 3/4 cup flour
  • 3/4 teaspoon baking powder
  • 1 tablespoon Italian seasoning
  • pinch of salt 
  • pinch of red pepper flakes 
  • 3/4 cup whole milk
  • 1 egg, lightly beaten
  • 1 cup shredded mozzarella cheese
  • 1/4 cup grated Parmesan cheese
  • 1 cup cubed pepperoni
  • 1/2 cup store-bought pizza sauce
1. Preheat the oven to 375 degrees. Grease a 24-cup mini-muffin pan. In a large bowl, whisk together the flour, baking powder, Italian seasoning, salt and red pepper flakes (if using) ; whisk in the milk and egg. Stir in the mozzarella, Parmesan and pepperoni; let stand for 10 minutes.


2. Stir the batter and divide among the mini-muffin cups. Bake until puffed and golden, 20 to 25 minutes.


3. Meanwhile, microwave the pizza sauce until warmed through. Serve the puffs with the pizza sauce for dipping.


Delicious!

Sunday, March 25, 2012

Samoa Cupcakes

I love baking cupcakes and love finding new recipes to try! I found this recipes for Samoas Cupcakes like the Girl Scout cookie! 


Inspiration


Ingredients
For the Cupcakes

  • 2 cups sugar
  • 1-2/4 cup flour
  • 3/4 cup Cocoa
  • 1-1/2 tsp baking powder
  • 1-1/2 tsp baking soda
  • 1 tsp salt
  • 2 eggs
  • 1 cup milk
  • 1/2 cup vegetable oil
  • 1 tsp vanilla
  • 2 tsp coconut flavoring
  • 1 cup coconut, packed
  • 1 cup boiling water


For Salted Caramel Buttercream

  • 2 stick butter, softened
  • 2 tsp vanilla
  • 1/2 cup caramel topping, plus more for drizzling
  • 1 lb powdered sugar (about 4 cups)
  • 1 tsp salt


For the Homemade Chocolate Syrup

  • 1/4 cup cocoa powder
  • 1/4 cup sugar
  • 1/4 cup cold water
  • pinch of salt
  • 1/2 tsp vanilla


Preheat oven to 350 degrees and line 24 muffin tins with cupcake liners.


In a large bowl, combine sugar, flour, cocoa, baking soda, baking powder and salt.


Add in eggs, milk, oil, vanilla and coconut flavoring and mix well.


Mix in coconut and then add boiling water.(Batter will be very thin).


Pour batter into muffin tins, filling each cup not more than 3/4 full. Bake at 350 degrees for 22-25 minutes or until a toothpick inserted in the center comes out clean. Let cool for a few minutes and then remove and place on wire cooling racks.


For the salted caramel buttercream.


First, cream butter until fluffy.


Add in vanilla and caramel topping. Add powdered sugar and salt and mix until smooth. If the icing is still too thin add more powdered sugar.


Wait until the cupcakes are completely cooled and then ice them with the buttercream.


For the Homemade Chocolate Syrup


Combine all ingredients in a small saucepan over medium heat and whisk until smooth.


Bring sauce to a boil and continue to whisk until sauce becomes thick. Remove from heat and let cool slightly.


Finish the cupcakes by drizzling the chocolate syrup and the leftover caramel topping over the iced cupcakes. Top the cupcakes with some toasted coconut flakes. 


Enjoy!

Friday, March 23, 2012

Wrapped Hair Comb

Today's craft is a simple one. I've been wrapped up with working on my sister's senior year prom dress. The dress is going to be amazing....but it has been a bit time consuming. I cannot wait to reveal it though! For now, here's a really simple way to spruce up a basic plastic hair comb.


Inspiration


Supplies

  • Plastic hair comb
  • Embroidery Floss
  • Scissors


Tie your embroidery floss to the comb and start wrapping it around the top in between the teeth. Continue to wrap, changing colors as desired, until you reach the end!


The color combinations are endless. 


Wednesday, March 21, 2012

Dyed Jeans

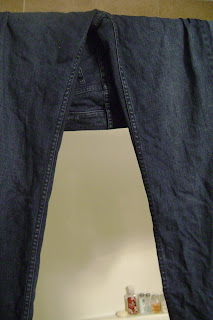
I have a pair of jeans that I love the fit of but I'm not a fan of the light color. I prefer darker jeans. I would hate to throw them out because I do really love the fit but I never wear them because I don't like the color. Luckily for me they were 99% cotton. So, I was able to buy fabric dye and darken them up!


Inspiration


Supplies

  • Article of clothing (preferably cotton)
  • Rit Dye (liquid or concentrated powder)
  • Washing Machine


Follow the directions on your package of dye. I used the concentrated powder kind. I had to dissolve it in warm water first.


Then, I filled my washing machine up with enough hot water for the jeans to move freely in. I soaked the jeans with water and squeezed out as much water as possible. Then, I added the dye filled water and tossed in the jeans. I let the washing machine go for 30 minutes before the rinse cycle started. I hung the jeans up to dry and viola! I had darker jeans!


Be sure to run your washing machine with a cup of bleach after dying in it! 

Tuesday, March 20, 2012

T-Shirt

I needed a shirt to wear with my skirt I made. I'm not a huge fan of just tank tops. So, I decided to make a t-shirt. I thought I would try my hand at making a t-shirt by using a t-shirt I already had as a pattern.


Inspiration


Supplies

  • 1 yard of knit fabric
  • T-shirt
  • Scissors
  • Coordinating thread
  • Sewing Machine
  • Stick pins


Layout your fabric. I folded mine so I would only have to cut out the shirt once. Lay your existing shirt on top. I folded my sleeves back and pinned them to keep them out of the way. Cut a bit away from the shirt to give you room to sew a 1/4" seam.


Then, cut out the sleeves, pin it up and sew it!

Monday, March 19, 2012

Bubble Skirt

I decided to try my hand at sewing a skirt from a pattern. I found a pattern from McCalls. I did some readjusting to it to fit the kind of fabric I had and the casual feel I was going for.


Inspiration


Supplies

  • McCalls 5591 pattern
  • 2 1/2 yards fabric
  • Zipper
  • Scissors
  • Sewing Machine
  • Coordinating thread
  • Stick pins


Layout your fabric and cut out the parts from the pattern.


Begin sewing up the skirt. I started by connecting the waistband pieces together and then attaching the skirt to the waist band. Add in the zipper and sew up the belt.


Sunday, March 18, 2012

Turquoise Chip Bracelet

I had a bunch of turquoise chips leftover from my turquoise earrings I made. So, I decided to make a bracelet to match.


Inspiration
Finding uses for materials I had.


Supplies

  • Chain bracelet
  • 2" head pins
  • Turquoise chips
  • Round nose pliers


Take a 2" head pin and put a couple of chips. Make a loop with your round nose pliers


Tighten loop around a link on the bracelet. Continue adding head pins with turquoise chips until you reach your desired volume around the entire bracelet.


Ta da!


Saturday, March 17, 2012

Wire Chandelier Earrings

I decided to get a little creative on my own this time. I love how Pinterest may not directly inspire a project but helps to make the creativity inside flow!


Inspiration
The creativity Pinterest helps flow


Supplies

  • 16 gauge wire
  • 4 large beads
  • 2 small beads
  • 2 shaped or small beads
  • Earring backs
  • 6 2" head pins
  • 2 eye pins
  • Round nose pliers


First, take the 16 gauge wire and cut two pieces about three inches long. Starting in the center of one piece, use the round nose pliers to create a loop. Take the other side and create another loop underneath. Create a loop on each end too.


Take your head pins and insert them into two large beads and one small/shaped bead. Loop the ends of the head pins and connect them to the loops of the wired earring. I put one large bead on each end and the shaped bead in the middle on the bottom center loop. Take a eye pin and insert it into the small bead. Connect the bottom of the eye pin to the wired earring and the top to the earring back.


Now, you have cute chandelier earrings!


Friday, March 16, 2012

Beaded Wrap Earrings

I saw this photo on Pinterest and decided to make my version of it to match the twisted beaded necklace I made. 


Inspiration


 Supplies
  • 2 sizes of seed beads
  • Teardrop beads
  • Memory wire
  • 26 gauge wire
  • Earrings
  • Round nose pliers
  • Wire cutters

Take your memory wire and cut it to the size you would like your circle earring to be. Then, use your needle nose pliers to make a loop at the top that you will use to connect it to your earring back. 


Take one size of seed bead (I used my larger size) and start beading around your circle of memory wire. Halfway down I added three teardrop beads as well. Use your 26 gauge wire to wrap in between each larger seed bead and string a smaller one after you wrap it around the memory wire once. Continue all the way around. 


Take the other end of the memory wire circle and loop it around the first loop to complete the circle. Add your earring back and that's it! For interest I added a larger turquoise bead and a small black bead. 


Thursday, March 15, 2012

Twisted Beaded Necklace

I need a necklace to go with an outfit I have for an event coming up. While browsing Pinterest I found a picture that I used as inspiration to make it.


Inspiration


Supplies

  • Necklace chain
  • Beading string
  • Beads (your choice of sizes, shapes and colors)
  • Scissors
  • End clamps


First, string your beads. I did several strands of different color, size and shape of beads.


Attach the beaded strands to the necklace chain with the end clamps. That's it! Enjoy!

Wednesday, March 14, 2012

Layered Beaded Necklace

I was inspired by a photo of a beautiful necklace I found on Pinterest. Here is my interpretation of it.

Inspiration


Supplies
  • Beads
  • Metal eye pins
  • Necklace chain
  • Round nose pliers
  • Wire cutters


First, start a link by putting a bead on an eye pin and using the round nose pliers to create a second eye on the other end.


Then, take a link out of the middle of the necklace chain to open it up. Start adding your beaded links. 


Continue to add beaded links until you have the length and number of strands you desire. Add any embellishment you would like. I added a bird pendant.